
One of my friends saw my sketchnotes that I post on Instagram (88keys2happiness) and suggested I use the same technique to tell the story of salvation from the Bible.
I’ve been using the visual notetaking technique of sketchnotes for several years, and my style has evolved over time. This is from a recent sermon …
I thought “sketchnoting through the Bible” was a great idea and decided on these general requirements …
- Readable – the visuals and font should be readable.
- Limited scenes – All scenes should fit onto one sheet of paper, front and back. A single sheet can easily be tucked into a Bible or notebook for quick reference.
- Focus on 1 aspect – Realizing that it is impossible to convey the comprehensive story of the Bible in less than the entire Bible, only include the essential information for selected key themes.
- Shareable – the final result should be shareable electronically and easily printable.
How Many Scenes?
In 2016, I discovered Chris Bruno’s book, The Whole Story of the Bible in 16 Verses, at a book store. The concept of summarizing the entire Bible in 16 verses intrigued me, so I developed my own version as part of a challenge I assigned myself to write 1,000 every day.
Others have also selected their own set of 16 verses. With over 31,000 verses in the King James Version, obviously almost infinite variations of 16 verses are possible. Here are a few posts I came across …
As I reviewed my own set of 16 verses and those of others, I decided that 16 scenes was too few. Then I had another idea.
I use 1.5×2 inch self-adhesive notes frequently, and drew a few quick sketches to see if this size would work. It did, and I further calculated that a 5×5 grid of self-adhesive size table cells easily fit on a sheet of paper (8.5×11). Thus I decided to use 25 scenes from the Old Testament (side 1) and 25 from the New Testament (side 2).
Early Steps
For the first step, I created a spreadsheet in Google Sheets to plan each scene, which I called panels. Ultimately, I used this approach for about 20 scenes, and then switched to making notes as a layer in the graphic design.
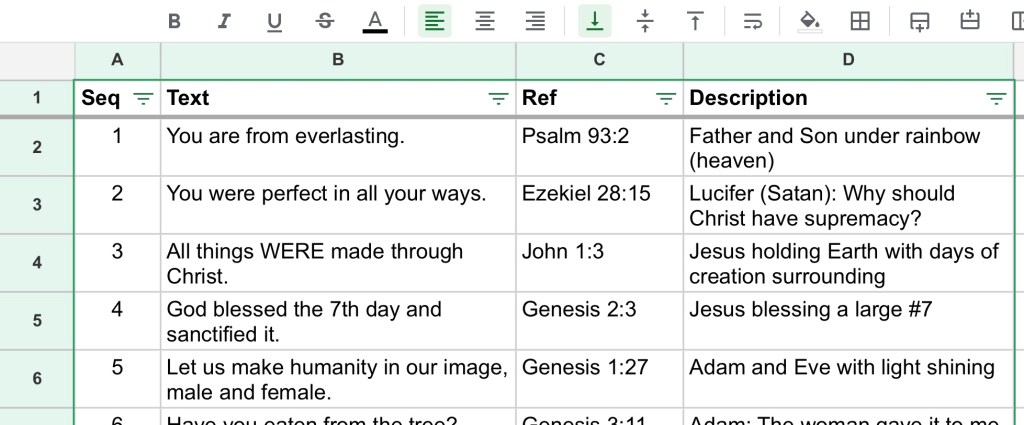
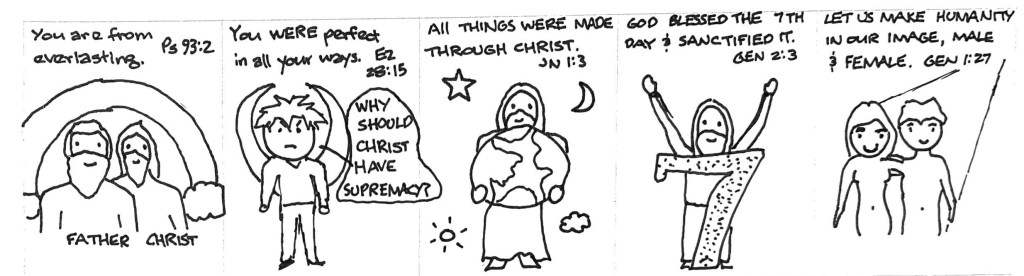
After outlining the first few panels in Sheets, I then drew a series of sketches by hand using a 5×5 grid I created in Apple Pages.
Next Time
In the next post of this series, I’ll be sharing my design process for each panel.
